How to Maximize Storage Space in Your Arcade and Redemption Room
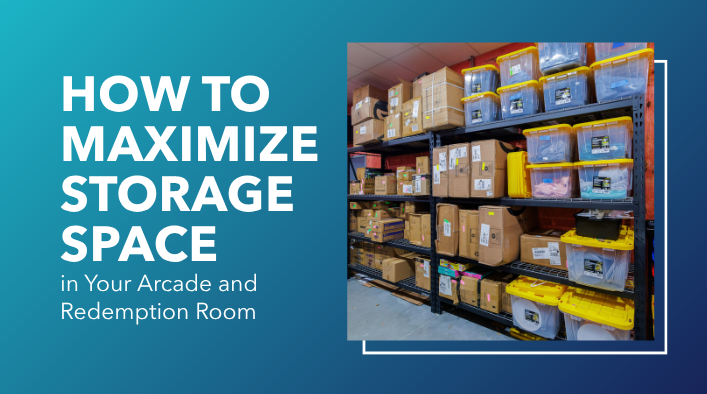
An organized storage room is the secret to a fast, profitable redemption counter. When items are easy to find, restocking moves faster, lines stay short, and inventory stays accurate.
Whether you have a massive backroom or just a few small closets, setting up clear storage zones helps your team keep the floor fully stocked. Every facility is unique, so consider these industry best practices as flexible guidelines to help you build a system that works best for your team.
1. Give Everything a Single Home (and Group by Theme)
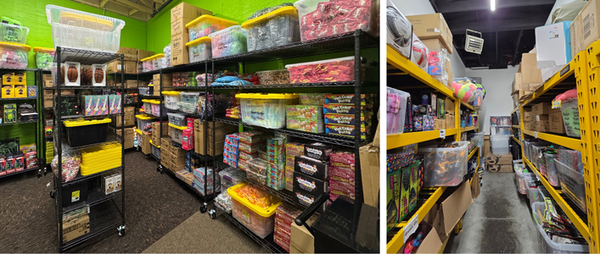
When backstock items are scattered across multiple storage locations, employees spend extra shift time hunting for stock or assuming an item is sold out when it is actually just misplaced.
- Assign physical zones: Consider setting aside specific shelving areas for display wall backstock, showcase items, bin toys, and game floor items.
- Group by theme within each zone: Once you set your physical zones, organize items by theme. For example: When grouping display wall items, assign specific shelves to each display theme such as Action Gear, Accessories, and Plush.
- Mirror your front counter: Try arranging your storage shelving to match the physical layout of your front redemption counter or display wall so restocking feels natural.
- Organize by value if preferred: While grouping by theme and physical location is generally the most efficient method, some locations prefer to organize storage by ticket value. Choose whichever setup makes the most sense for your location.
- Separate arcade floor inventory: For crane and/or merchandiser backstock, try dedicating a specific shelf to each machine and labeling it with the game's name so refills are easy to locate. Keep them physically divided from redemption items, as these often come out of a distinct budget and should be tracked independently.
- Keep high-frequency items accessible: Store fast-selling bin items and high-velocity stock near the front door of your storage space so team members can access them easily.
2. Ditch Big Cardboard and Use Clear Totes
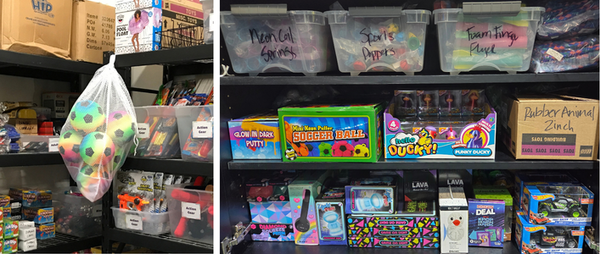
While leaving unopened cases and inners makes sense, storing open shipping boxes on shelves often leads to inventory confusion. It is hard to tell if an open box is full or empty, which can throw off your counts.
- Keep unopened cases sealed: Leave original shipping boxes fully sealed until you are ready to use them. Sealed cases are much easier to tally during inventory.
- Recycle the master carton when opened: Once a case pack is opened, pull out the inner packages and recycle the large outer box to save valuable shelf space. If the inner packaging is not labeled with product information, be sure to write this on the box.
- Move loose items to clear totes: Once an inner has been opened, place any loose items into clear plastic totes to allow staff to quickly locate items.
3. Label Every Box and Tote
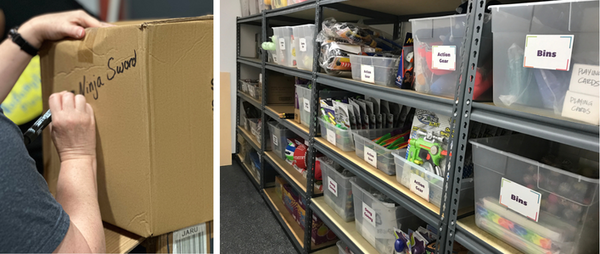
Labeling box contents takes the guesswork out of restocking, helping your team grab what they need without searching through multiple containers.
- Label inner packs: If inner packages do not have clear product names printed on them, write the product name on the package with a marker before placing it on the shelf.
- Use color-coded stickers: If your facility uses multiple storage locations (like a back closet, garage, or under-counter space), try using colored sticker dots to organize boxes by category (e.g., Red = Redemption Wall, Blue = Crane Plush, Green = Counter Bins).
- Label clear totes: Use dry-erase markers or sticker labels on clear totes so anyone walking into the room knows what belongs inside.
4. Separate High-Risk Items and Administrative Supplies
Keeping high-ticket merchandise and administrative supplies separate from general redemption stock helps reduce clutter and protects valuable inventory.
- Secure high-ticket items: Consider storing high-value showcase prizes in locked metal cabinets or opaque, zip-tied totes in a manager's office to keep them out of high-traffic areas.
- Move low-frequency supplies out of the way: Extra peg hooks, display baskets, bulk receipt paper, and spare game cards are only needed occasionally. Storing these further back on high shelves or in a manager's closet keeps main walkways clear.
- Keep restricted areas separate: Attractions inventory, liquor, and branded employee uniforms are best kept behind locked doors accessible only by management.
5. Create a Simple System for Damaged Items
Without a clear process, damaged items often sit on stock shelves or get mixed back into sellable inventory. Finding a quick, simple way for staff to log damaged stock keeps your inventory numbers accurate.
- Set up a "Damaged Goods" bin: Keep a dedicated tote or box in your storage area for dry, potentially repairable items (such as a torn hang tab or missing zip tie).
- Log damaged or unsafe items easily: For wet, broken, or leaking items, set up a simple logging process. This could be a printed paper log sheet attached to the damage bin where staff write down the item name before tossing it out, a logbook at the manager's desk, or a dedicated email address (e.g., damages@yourcenter.com) where staff can snap a photo and send it to management.
- Clear out damages monthly: Process and write off damaged stock before running your monthly inventory count so your system stays up to date.
Useful Resources for Your Storage Setup
Ready to kit out your backroom or refresh your storage space? Check out these handy visual guides:
- Download Our Starter Recommendations for Redemption + Storage – Use this one-sheet checklist to find recommended shelving, clear totes, label tools, and supply essentials.
- View Our Storage Best Practices Guide – Take a visual tour of ideal redemption storage layouts, shelf mapping techniques, and tote organization strategies.
Need help optimizing your redemption space or inventory strategy? Reach out to our team anytime at smileteam@redemptionplus.com or call 1-888-564-7587.